**UPDATE: The completed pattern is now available for download at Craftsy. Here is the link: https://www.craftsy.com/quilting/patterns/kelsey-baby-quilt/460346
(insert fanfare here)

just kidding…it probably is not that exciting unless you really like quilting and the process of coming up with a quilt. This quilt was super easy to do. The hardest part was deciding what fabric should go where. Let me begin by telling you that I absolutely love graph paper. I always have. I can remember spending hours drawing shapes as a little girl in these cute little graph notebooks from Winns (like a Rite Aid or walgreens only cooler…cause I think they sold fabric). Anyways, So I pretty much always start out with some graph paper. This quilt was for a little baby girl. I had a picture of the nursery “feature” wall. It was a grid of 1.5 foot squares in pinks, greens, and browns. Also had a picture of the purchased bedding from Target, so I kinda had an idea of what style to go with. Modern and sweet with a very spring-like color pallet. So I went to my local quilt shop for some inspiration. I found this…

Girl Friday from Cosmo Cricket for Andover. Uber-cute! Took a fat quarter pack home and then added to it from my stash. I ended up with 11 different fabrics for the quilt. Some from the fat quarter pack, some from my stash…just so you dont’ think these are all from the same line of fabric. Some I inherited from my grandmother, others are random finds. So here is the front of the quilt drawn out on graph paper.

As you can see, I wrote out how many squares I would need, borders, cornerstones, etc. Then gave myself a min cutting yardage. The main deciding factor in the size of the squares what my fat quarters. As I mentioned earlier, I’m kinda a Scrooge when it comes to fabric, so this size square allowed me to maximize my fat quarter usage.
Next came the back. I have seen a ton of quilts with an almost all white back except for a strip of color or strip of squares. So that is where I got the idea for this. Here is the graph paper drawing of the back. You will notice that I included little pieces of the actual fabric and labeled it on the back of the quilt so I would know where I wanted each fabric.

I utilized a flannel design wall for the making of this quilt. It really helped me lay out the pieces on the front and the back. I made a makeshift flannel wall on the closet doors in our office where my sewing machine is. Here is what it looks like…

Totally basic. It is actually two different remnants that I attached to each door. So I can still open the doors without having to take all the tape down. Someday I hope to have a bigger, more permanent one…but alas…*sigh*
ok…back to business. Now…finished the top. Made my quilt sandwich…how to quilt? The ultimate question. I am not very confident in my stippling/meandering machine quilting…in fact I’ve never done it on a quilt. And to be honest…stippling doesn’t appeal to my type A personality…but I happened to have a template for the cool concentric circles that fit my squares perfectly…so I broke out my handy graph paper and checked out the possibility…

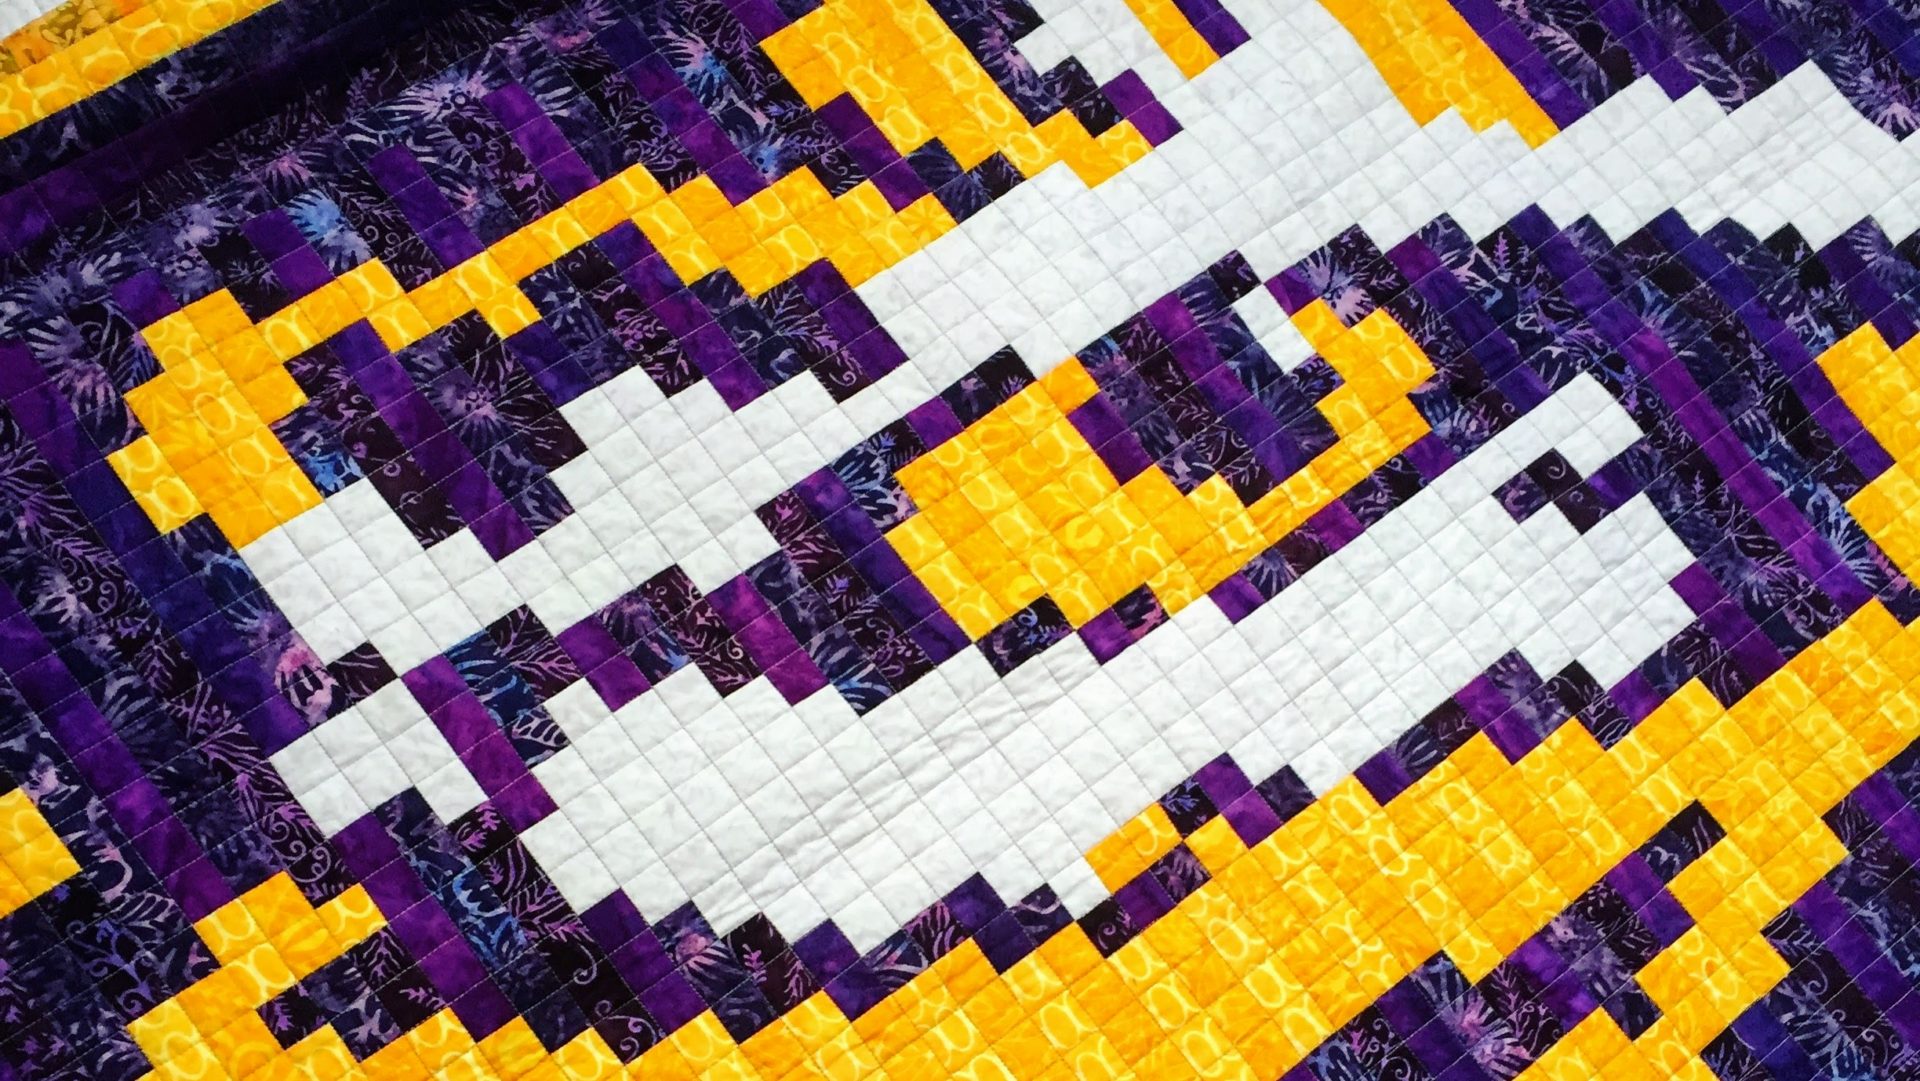
Not the best drawing in the world, but you get the idea. LOVED it! So I actually used my walking foot and just swung the quilt around and around. I was able to start at the side of one of the circles and just wind back and forth only finishing half of the circle at a time…then I would start again and complete the circle. I really loved how the quilting turned out. I plan to do this quilting again on something. And it got me thinking…I dont’ have to make squares to fit my template…I could use any circle that will fit…a plate…a cup…anything. So here is the finished product again…front …
and back…

And seeing these pictures makes me realize I have to work on my photography skills…yikes!
So there you have it. An incredibly long post…long overdue! Lots more to share…but another day 🙂
Cheers,
Liz
Quilt
The squares ate cut at 4 1/2″…please change cutting instructions. No wonder why my squares and sashing doesn’t square up. But, how to I fix it? I am so upset😭
I’m so sorry you are having trouble. The squares are cut at 4 1/2” so when you sew them together with a quarter inch seam they finish at 4”. The sashing is cut to accommodate the 1/4 inch seam allowance as well. Is the seam allowance on your machine consistently 1/4”? That would be the first thing I would check. Also make sure you are cutting all the pieces with the same acrylic ruler and not using your cutting mat ruler as those can sometimes be off from one another. I will put my thinking cap on and see if I can come up with anything else that might help. My apologies for the difficulty you are experiencing.
Are your bigger squares cut 4.5″?
Hi! Yes, the big squares on the from are cut at 4.5 inches.
Such a darling quilt! Did you cut the squares 4″ or 4 1/2″? Thanks
Hi! The big squares on the front are cut at 4.5 inches.
Why can’t you just you charm pack..
Hi! A charm pack will definitely work. You will need to trim them down to the 4.5inch size though. I find that most charm packs aren’t cut exact, so trimming is necessary for the best results.
I love this quilt. Thanks for sharing your pattern and your grid. The back is great. Love your quilting as well. Good job!
I am inspired!! Just found out my niece is pregnantm& she’s not going to find out the sex, so I have to make an “anybaby” quilt
I love the quilt and the quilting! I have been working up the nerve to go beyond “stitch in the ditch”. Your work is very nice!
I just love this quilt! You have also inspired me to do more than stitch in the ditch! I really loved seeing the drawing on graph paper I do this also.
I want to make this in a bigger size. Can I make easy adjustments to make it bigger??
Hi Kathy! Yes, the original quilt has 4 inch finished squares and 2 inch finished borders. You could easily increase the size of the squares and borders, or add another 2 inch border and more 4 inch squares.
you are showing on your graph paper that each square = 2 inches.
however you then are asked if your squares are bigger than 4 inches
and you say yes they are 4.5 inches.
my question is this…
what are the exact measurements needed to make this quilt with 4.5 inch blocks?
1.) large blocks cut at 4.5 inchs needing ? how many blocks ____
2.) strips cut at ? ___ x___ W & L please needing how many_______
3.) small squares at end of strips block size? ____ how many?_____
thank you
Hi Margaret.
The Squares are cut at 4.5 inches and finish at 4 inches when they are sewn together with the appropriate quarter-inch seam allowance.
1.) Need a total of 84 squares
2.) the white strips are cut at 2.5 inch wide by the length of the associated side. The inner strips are cut 16.5 inches length for top and bottom and 20.5 inches for sides. The outer strips are cut 28.5 inches for top and bottom and 32.5 inches for sides.
3.) Small squares are 2.5 inches. You need 8 squares.
Hope this helps, and sorry for the delay in replying.
Cheers,
Liz
You are a doll Liz! Thanks for a simplified version because I am mathematically quilt deficient. ;”)
What size are the 4 pieces in the cornerstone?
Hello. The 4 cornerstones finish at 2 inches. Cut each at 2.5 inches.
Wow! This is fantastic! I had a couple charm packs I couldn’t figure what to do with till I saw this! Sizing was different from yours but the idea was sparked. Great job!
Will this pattern work with charm packs??
Hi! Yes, this pattern would work well for a charm pack. You could either trim the charm pack down to 4.5 inches to work exactly as the pattern above is written. Or you could leave the charm pack as 5 inch squares and increase your borders and cornerstones to make up the difference.
I’m new at quilting. What do the numbers mean next to the fabric squares.? ex: 4 + (4) = 8
Also, 16.5 4 = 66 ?
And, 64 + 16 = 80 ?
Hi! The math that I think you are referring to are my notes calculating out how many squares I drew and how much I would need for borders. This quilt uses only 4 inch finished squares, 2 inch finished borders and 2 inch finished cornerstones. I’m hoping to do a more detailed pattern write up soon. Hope this helps explain things!
Hi Liz,
This is a very cute and easy baby quilt. I love it. When you do the “more detailed pattern write up”, hopefully with yardage amounts, etc., would it be possible to get a copy?
Thanking you in advance ~
Hi! I just uploaded the completed pattern to Craftsy. It is available for free to download. Here is the link: https://www.craftsy.com/quilting/patterns/kelsey-baby-quilt/460346
The Pattern is not free…have to purchase???
Love this and have cut my squares 4 in before I read the comments!!! Oh well I think it will be fine just a little smaller and I am using Americana scraps that I have a box full off and they don’t seem to be going down much!! Now my question is this how is this quilt put together, could you please send the instructions for what to do first, have been studying the picture and the method of setting it together is puzzling me, do you sew strips together then add the outside borders, if so in what order?? Bit confusing. Thanks Joyce
Hi Joyce. I just added the full pattern to craftsy. Here is the link: https://www.craftsy.com/quilting/patterns/kelsey-baby-quilt/460346
Just love this quilt. I’ve never quilted before but want to finish two my mom started. This is so pretty. I was curious what was meant by the term ” stitch in a ditch”. Look forward to seeing more of your work.
Hi Mary. Stitch in the ditch just means you quilt the quilt sandwich with the stitches going directly in the seams where you have joined your fabric. This tutorial on Craftsy has a good picture of what that means: https://www.craftsy.com/blog/2014/09/how-to-use-presser-foot/
I have lots of 5 inch squares already cut. How would this work?
Hi! You can either use the 5 inch squares as is or cut them to 4.5 inches. If you leave at 5 inches you will have to increase the sashing and cornerstones to 3 inches cut width.
Hi! Beautiful job! I am getting back to quilting after many years. I have never machine quilted before but would love to begin. Did you make a template and trace the quilting pattern onto your fabric, of just free-hand it all? Thanks so much!
Hi! Thank you for the comment. I did have an existing template to work from. However, you can use just a piece of cardboard but into the size circle you want. Then trace the circles onto the fabric with fabric marker or fabric pencil.
I love it! I have always loved graph paper, too!! Thanks for sharing.
It抯 hard to find educated individuals on this topic, however you sound like you understand what you抮e speaking about! Thanks
By way of introduction, I am Mark Schaefer, and I represent Nutritional Products International. We serve both international and domestic manufacturers who are seeking to gain more distribution within the United States. Your brand recently caught my attention, so I am contacting you today to discuss the possibility of expanding your national distribution reach.We provide expertise in all areas of distribution, and our offerings include the following: Turnkey/One-stop solution, Active accounts with major U.S. distributors and retailers, Our executive team held executive positions with Walmart and Amazon, Our proven sales force has public relations, branding, and marketing all under one roof, We focus on both new and existing product lines, Warehousing and logistics. Our company has a proven history of initiating accounts and placing orders with major distribution outlets. Our history allows us to have intimate and unique relationships with key buyers across the United States, thus giving your brand a fast track to market in a professional manner. Please contact me directly so that we can discuss your brand further. Kind Regards, Mark Schaefer, marks@nutricompany.com, VP of Business Development, Nutritional Products International, 101 Plaza Real S, Ste #224, Boca Raton, FL 33432, Office: 561-544-0719
Is anyone here in a position to recommend Massager Vibrators? Cheers x
dgfdfgdfgv
Seriously, once her bra comes off her tan lines define her tits perfectly and her puffy nipples beg to be sucked. petitebrunetteporn We love how sweet but sexy Lassie is.
Hey there! This is kind of off topic but I need some advice from an established blog. Is it difficult to set up your own blog? I’m not very techincal but I can figure things out pretty fast. I’m thinking about creating my own but I’m not sure where to start. Do you have any tips or suggestions? Thanks
Does anyone know AltSmoke of Valley Stream store based in 3205 N University Dr Suite F1 offers e-liquid made by Moreish Puff Made In UK E-liquid? I have emailed them at vaporprozusa@yahoo.com
Hello everyone ! can anyone suggest where I can buy Lift CBD CBD Vape Pen Sleep Well With Melatonin Cbn 200mg?
You could certainly see your enthusiasm in the work you write. The sector hopes for even more passionate writers like you who aren’t afraid to mention how they believe. At all times go after your heart.
You are looking for Free Backlinks then you came to the right place.
We offering you a free trial to try out our link-building service.
This can be used to link out to your website, inner page, google map, video, to any link you want to help power up and get more relevance too.
We want to prove to you that our backlinks work and so we’re willing to prove it to you risk-free.
Please create an account and then watch the video and submit your order details and let us help you get found online.
FREE TEST HERE: https://zeep.ly/6SDFB
All CBD Drinks https://www.cbd-guru.co.uk/product-category/cbd-gummies/
CBD Balms https://www.discovermagazine.com/sponsored/25-best-cbd-gummies-on-the-market
Wow, awesome blog structure! How long have you ever been running a blog for? you make blogging look easy. The entire look of your site is magnificent, as neatly as the content!
Does anybody know whether MadVapes vaporizer store located in 3465 W 6th St Suite 40 sells e-juice made by Mr. Freeze eLiquid? I have emailed them at volunteervapor@gmail.com
I would like to save all my blog posts on wordpress ?
Has anyone visited The No Smoke Shop? 🙂
great publish, very informative. I wonder why the opposite experts of this sector do not realize this. You should proceed your writing. I’m confident, you’ve a huge readers’ base already!
Good post. I learn something new and challenging on blogs I stumbleupon every day.
It’s always exciting to read content from other authors and use a little something from their web sites.
Has anyone shopped at Silver Cloud Vape Cafe Ecig Shop located in 106 Columbia Northeast Dr. Suite A?
A massage chair gets redhead Holly Molly nice and horny before she heads to bed. mature petite naked women This hottie can’t wait so that you can come show her bare pussy some critical love.
Great post however I was wondering if you could write a litte more on this topic? I’d be very thankful if you could elaborate a little bit further. Thank you!
Thanks , I’ve recently been looking for info about this topic for ages and yours is the greatest I’ve discovered till now. But, what about the conclusion? Are you sure about the source?
It’s going to be ending of mine day, however before finish Iam reading this impressive post to improve my experience.
Has anybody ever shopped at Madvapes of Anderson Vapor Store located in 1277, boul. des Seigneurs?
Thanks for finally writing about > Une solution pour la tenue desélections locales en 2021 – LA VALLEÉ INFO
Thanks so much for the article post.Really thank you! Want more.
Hi there, its good piece of writing on the topic of media print, we all beaware of media is a wonderful source of information.
Thanks-a-mundo for the blog.Much thanks again. Fantastic.
Really enjoyed this article, can you make it so I get an update sent in an email every time you publish a fresh post?
I really liked your article post.Really thank you! Cool.
Thanks again for the article post.Really looking forward to read more. Fantastic.
is cbd a sin
I really prize your piece of work, Great post.Also visit my blog post yeast infection
I value the blog article.
Very informative article.Really looking forward to read more. Fantastic.
Quantum EMFprotectors from Vortex BioShield® work to harmonize harmful rays by before they get a chance to effect your body in a negative way.
I’m not sure exactly why but this blog is loading very slow for me.Is anyone else having this issue or is it a problem on myend? I’ll check back later on and see if the problem still exists.
Normally I do not learn article on blogs, however I would like to say that this write-up very compelled me to check out and do it! Your writing taste has been surprised me. Thanks, very great article.
Xoilac Tv Trực Tiếp Bóng Đálịch thi đấu c2Nếu cứ chơi như cách vừa tiêu diệt Everton tới 3-1 trên sân khách
Wow! This blog looks exactly like my old one! It’s on a entirely different topic but ithas pretty much the same layout and design. Wonderful choice of colors!Also visit my blog post … Cryogen Air Cooler
Great, thanks for sharing this blog.Thanks Again. Fantastic.
Appreciate you sharing, great blog article.Really looking forward to read more. Fantastic.
Great article.Really looking forward to read more. Much obliged.
A round of applause for your blog post.Really thank you! Great.
Very neat blog post.Much thanks again. Want more.
I cannot thank you enough for the article.Really looking forward to read more. Cool.
Fantastic blog.Much thanks again. Cool.
Thank you for your blog article.Really thank you! Keep writing.
Great blog post.Really thank you! Fantastic.
I cannot thank you enough for the article. Keep writing.
Thanks for sharing, this is a fantastic blog.Really looking forward to read more. Really Cool.
Thanks-a-mundo for the blog article.Much thanks again. Will read on…
I am so grateful for your blog article. Much obliged.
Say, you got a nice blog.Really thank you! Cool.
Aw, this was a really good post. Taking the time and actual effort to produce a good articleÖ but what can I sayÖ I put things off a whole lot and don’t manage to get nearly anything done.
I cannot thank you enough for the article.Much thanks again. Cool.
You hold a very special talent. Your marketing talents are literally impressive. All the bests for publishing content on the internet and training your audiences.